Best Practice Termination Instructions

Part Number: S45-1700P
Simply45® ProSeries Pass-Through Unshielded RJ45 Modular Plugs
Congratulations on purchasing Simply45’s ProSeries Pass-Through RJ45 modular plugs for UTP (unshielded) LAN cables. Our ProSeries Pass-Through RJ45 plugs include the uniquely designed and patented Cap45® (PATENT 10,811,831 B1).
Cap45®
(PATENT 10,811,831 B1)

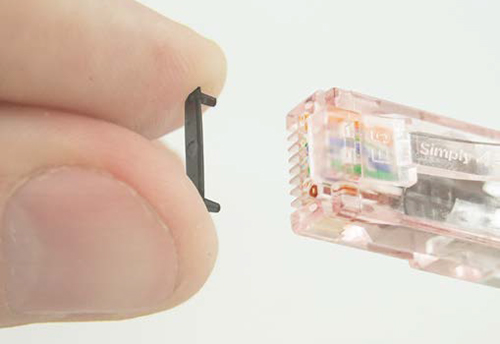
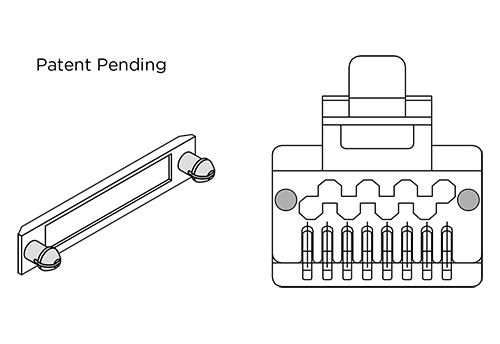
Cap45® is an isolation cap/bar that snaps onto the front of the pass-through RJ45 plug after termination covering the exposed wire’s ends. Cap45® prevents electrical shorting in the RJ45 mod socket due to improperly trimmed wire ends touching the socket walls.

With other brands pass-through RJ45 mod plugs, there is a risk that the wire ends after termination are not correctly trimmed flush to the plug. This risk is why some manufacturer brands discourage the use of pass-through RJ45s and some network systems cannot be certified if using pass-through plugs.

With Simply45® ProSeries’ Cap45® these risks are eliminated. That is why Simply45 ProSeries Pass Through RJ45 Modular Plugs are the recommended pass-through plugs for commercial applications, HDBaseT, PoE/PoH, and all commercial & residential certified systems.
STEP 1
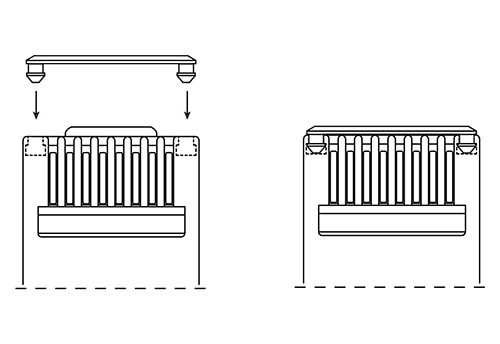
Align the 2 posts on the Cap45® with the 2 holes on the front of the plug.
STEP 2
Push the posts into the plug until the Cap45® is snug to the plug body.
Best Practice Termination Guide

The S45-1700P Simply45 ProSeries Pass-Through UTP (Unshielded) RJ45 mod plugs are designed to work “Simply Better” and also improve termination performance. The S45-1700P RJ45 plugs are uniquely designed to provide greater electrical conductivity and improved cross-talk performance; all critical to supporting today’s LAN cable applications.

For improved termination performance, please follow these Step by Step Instructions for terminating the S45-1700P Simply45 ProSeries Pass-Through Plugs for UTP (unshielded) LAN cables.
Wiring Termination Pattern
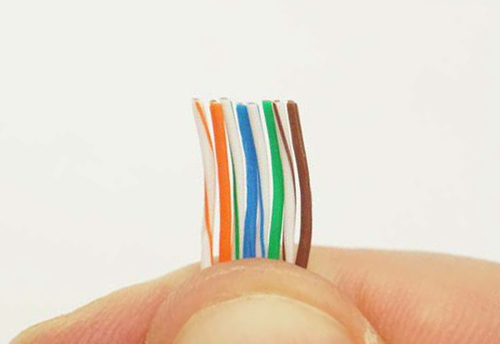
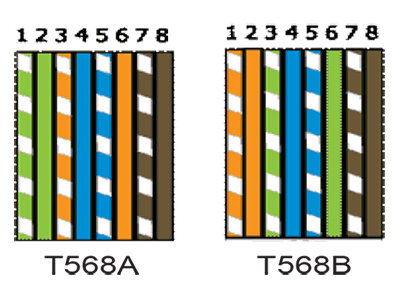
Align wires according to Termination Pattern either Type A or Type B.
Hint: Hold wire so that the White Orange and Orange wires are closest to you and put in wire pattern order 1-8.
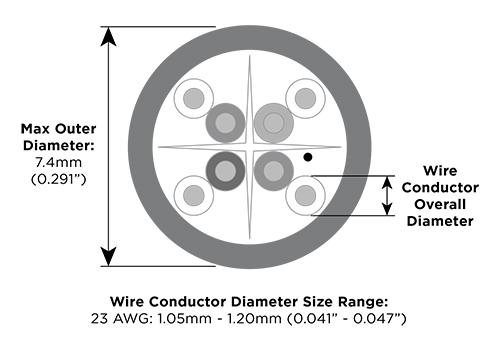
S45-1700P LAN CABLE Specifications UTP/Unshielded
STEP 1
If using Cat6 UTP cable, trim center spline/pair separator as close to the cable jacket as possible without nicking any of the wire conductors.
STEP 2
Make sure each wire conductor is straight. We recommend using the Simply45® Adjustable LAN Cable Stripper (Part: S45-S01BL/YL) that has a wire straightener comb on the top.
STEP 3
Then straighten and align wires to the correct alignment pattern (Type A or B). The B Pattern is most commonly used today. Using an angled flush cutter tool (such as Simply45 part: S45-801), trim wire ends straight before inserting them into the load bar.
STEP 4
The S45-1700P plug uses a Hi/Lo wire layout. Insert the pattern-aligned wires into the rear of the plug and push them out through the front of the plug. Then verify that the wires are still in the correct pattern alignment.
STEP 5
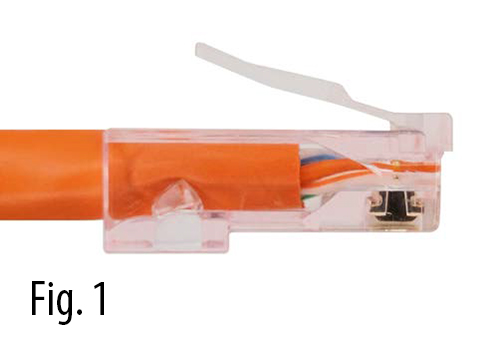
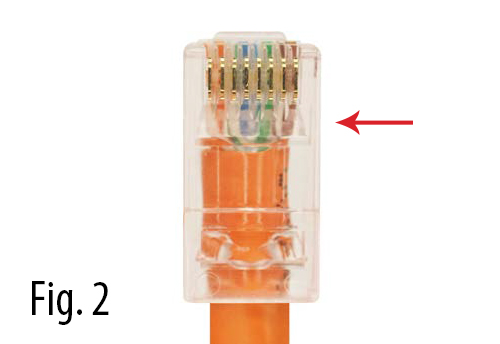
Push the plug down and over the cable jacket. (fig 1) The Simply45 ProSeries plug is designed to allow the cable to be inserted deeper into the plug than other brand RJ45 plugs. Notice in the picture (fig 2) that the cable jacket should come to the horizontal line underneath the plug. This is very important as you want to minimize the length of the untwisted wires. This design improves signal integrity and negates crosstalk interference.
STEP 6
Insert the loaded plug into the crimping socket on the Simply45 crimp tool. Make sure plug is fully inserted.
STEP 7
Firmly and in one quick and steady motion fully compress the crimper handles until it releases. The Simply45 crimpers are ratcheted. This means that the tool handles will not release until the full and complete crimping cycle has been completed.
STEP 8
Inspect the terminated plug to be sure wires have been properly trimmed. Then attach Cap45® to the plug following the instructions indicated before.