Best Practice Termination Instructions
Part Number: S45-1100
Congratulations on purchasing Simply45’s Standard WE/SS (8P8C) RJ45 Modular Plug for Cat6/6a UTP cables. These RJ45 plugs include the uniquely designed Simply45® Bar45® load bar.
1. Bar45® uses a Hi/Lo stagger design and is made of a material that provides better signal isolation improving NEXT performance;
2. On S45-1100, the Bar45® is located over the RJ45 pins. This allows the LAN cable to be inserted deeper into the Plug. This reduces the length of untwisted wires improving signal integrity and negating crosstalk interference.
For improved termination performance, please follow the step-by-step instructions for terminating the S45-1100 RJ45 modular plugs.
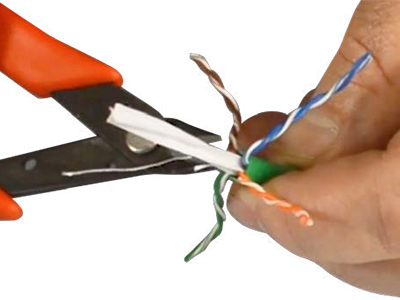
STEP 1
If using Cat6 UTP cable, trim center spline/pair separator as close to the cable jacket as possible without nicking any of the wire conductors.


STEP 3
Then straighten and align wires to the correct alignment pattern (Type A or B). The B Pattern is most commonly used today. Using an angled flush cutter tool (such as Simply45 part: S45-801), trim wire ends straight before inserting them into the load bar.
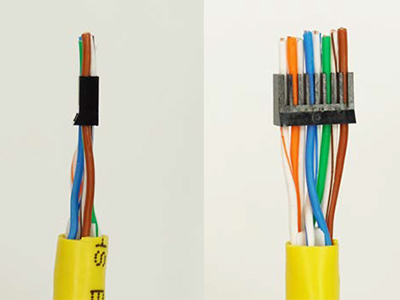
STEP 4
Insert the Pattern Aligned wires asshown above (B pattern shown)
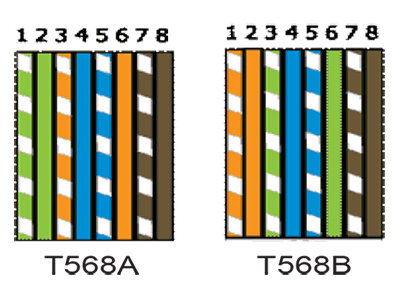
STEP 4 (continued)
Align wires according to Termination Pattern either Type A or Type B.
Hint: Hold wire so that the White Orange and Orange wires are closest to you and put in wire
pattern order 1-8.
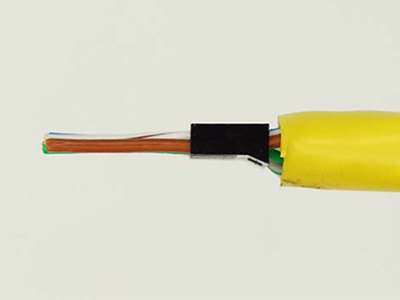
STEP 5
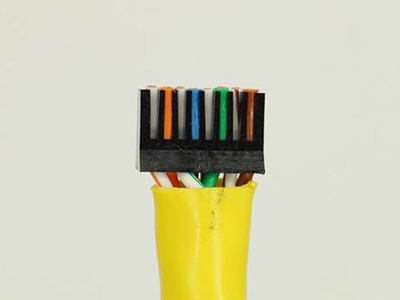
Slide Bar45® down until it touches or comes close to the cable jacket.
STEP 6
Then trim wires flush with the load bar using the Angled Flush Cutter (part: S45-801). Please be sure to trim the wires properly. If wires are not trimmed close to the load bar, the load bar will not be set properly over the Plug pins.


STEP 7
Insert the cable with the Bar45® into the plug with the load bar over the pins. (fig. 1). Notice in the picture (fig. 2) that the cable jacket should come to the horizontal line underneath the plug (S45-1100).


STEP 8
Insert the loaded plug into the Simply45 Crimper socket. Be sure that plug is fully inserted. Then complete crimping cycle.


